Teachers and pupils can use digital textbooks through the school's created Opiq account, which is managed by an administrator at the school.
Additional information can be requested by writing to info@opiq.co.ke or by calling +254 205 148 194 (Mon-Fri from 9:00 am to 5:00 pm). Also, check announcements on our Facebook page.
How to get started with Opiq?
Pupil's Opiq account is created using their email address
- The school administrator or the teacher has added the pupil as Opiq users. The pupil receives an e-mail message through which they can set an Opiq password.
- When user account has been created using an e-mail address, the pupil logs into Opiq at https://opiq.co.ke, enters the e-mail address in the user ID field and the password he/she has set.
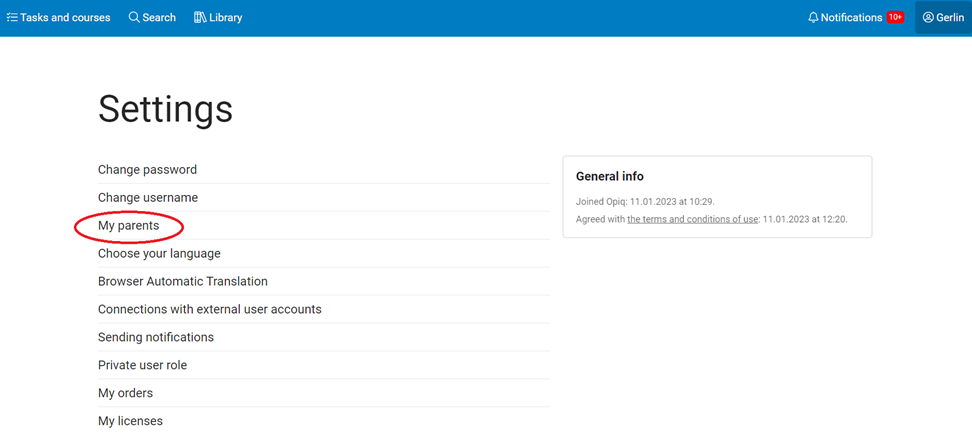
- The pupil can add an Opiq account to a parent by clicking on the "My parents" link in their account settings.
IN ADDITION
If the school does not have an Opiq account, please ask the school representative to contact the Opiq team at the email address info@opiq.co.ke.
If the school does not use Opiq or does not allow access to the pupils for any reason, the pupil can start using Opiq as a private user. A private user account can be created here.
Logging in and licenses
Log in like this:
- Go to https://opiq.co.ke login page and click on the Opiq logo.
- When the login page opens, enter your email address in the field called “Opiq user ID” field and your password in the password field.
- Click the button “Log in”.
- The dashboard of Opiq opens and you can immediately start using digital textbooks.
To use Opiq, the user needs to have a license. The license gives the pupil access to digital textbooks belonging to a specific Opiq package. Read more here.
Pupil dashboard view
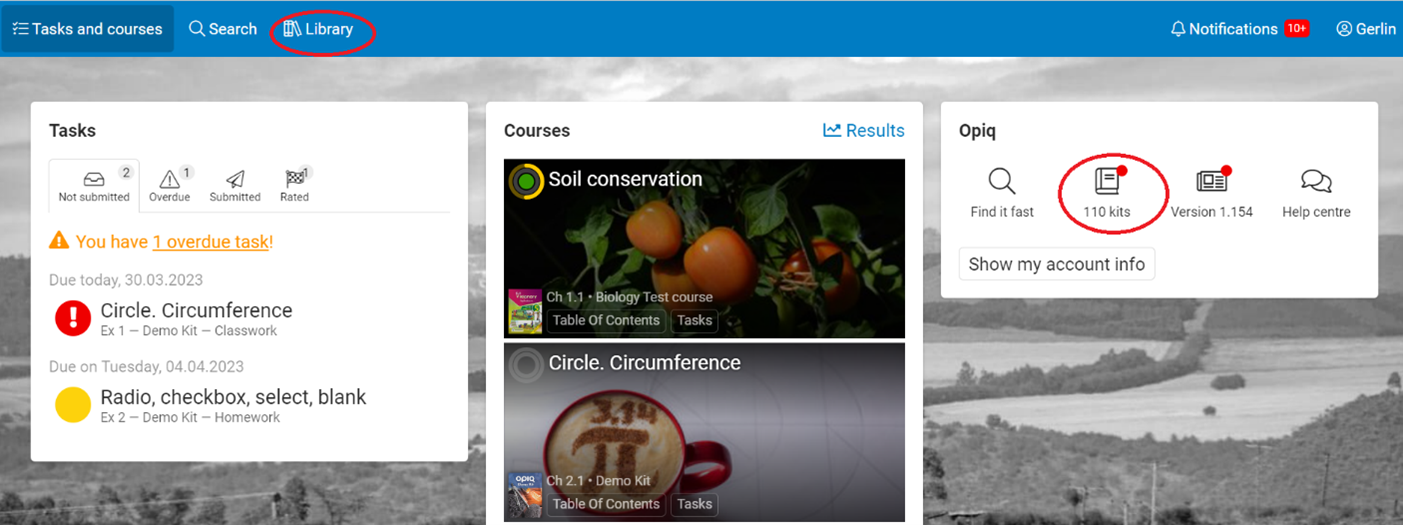
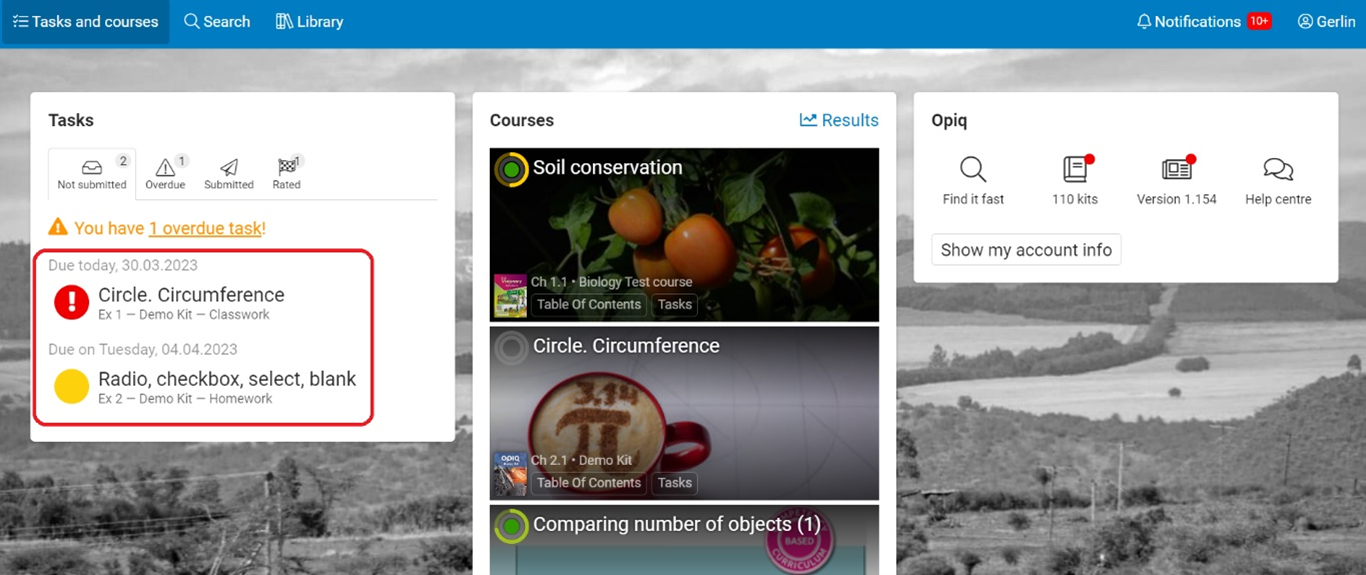
Logging in to Opiq opens the dashboard view, which is divided into different blocks. Starting from the left, the blocks are: tasks, bookmarks, Opiq direct references.
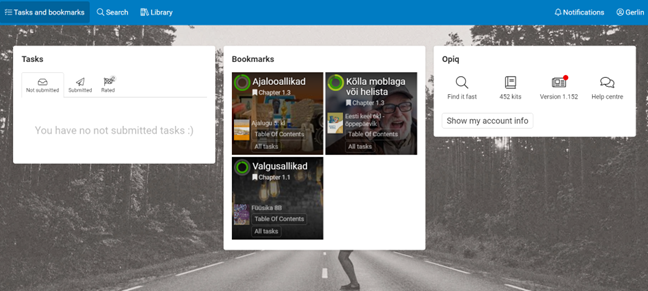
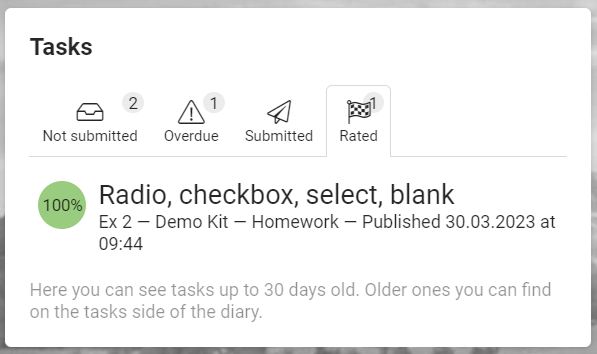
Tasks block
The tasks block displays the assignments that teachers have assigned to the pupil. On the pupil's dashboard, all tasks are divided in the same block according to the status of the work - not submitted, overdue, submitted, rated.
Not submitted tasks
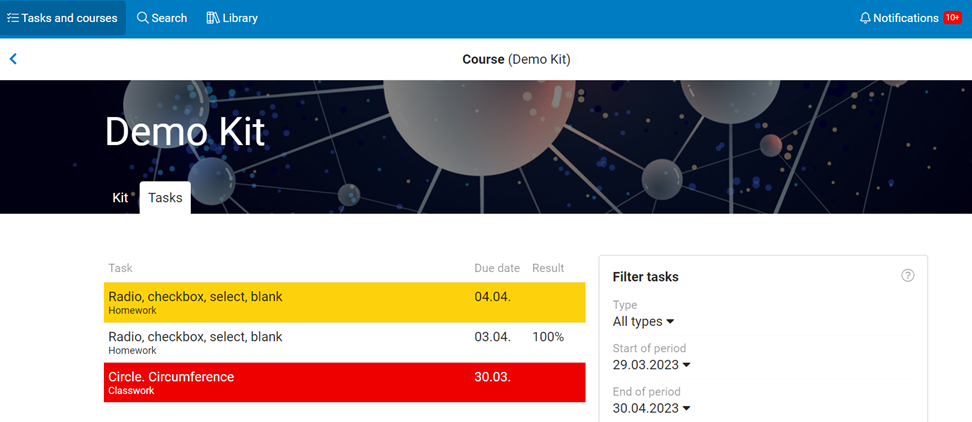
Not submitted tasks are those tasks that have not yet been sent to the teacher and the deadline of a task has not passed yet.
Unsubmitted task is marked with a yellow bubble, and if the task is due on the same or the next day, with a red bubble.
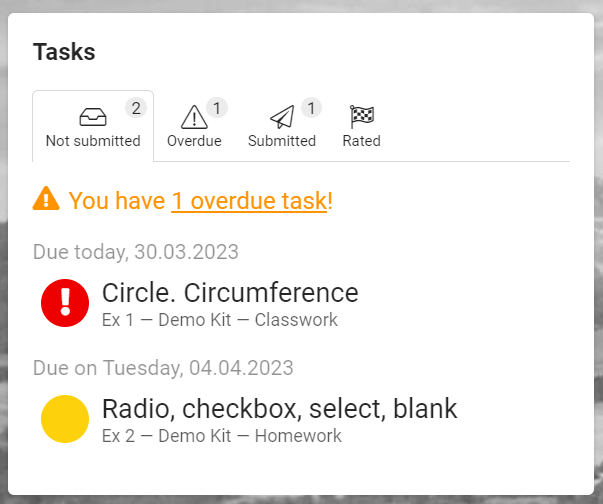
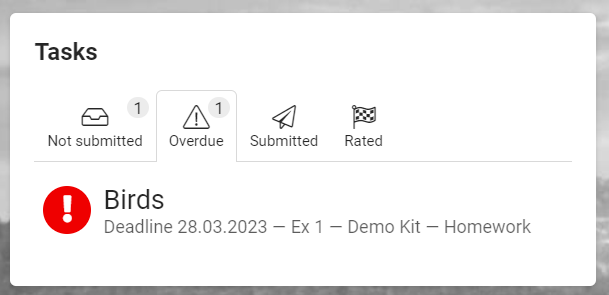
Overdue tasks
Overdue tasks are unsubmitted tasks that have passed their deadline and are marked with a red bubble.
Submitted tasks
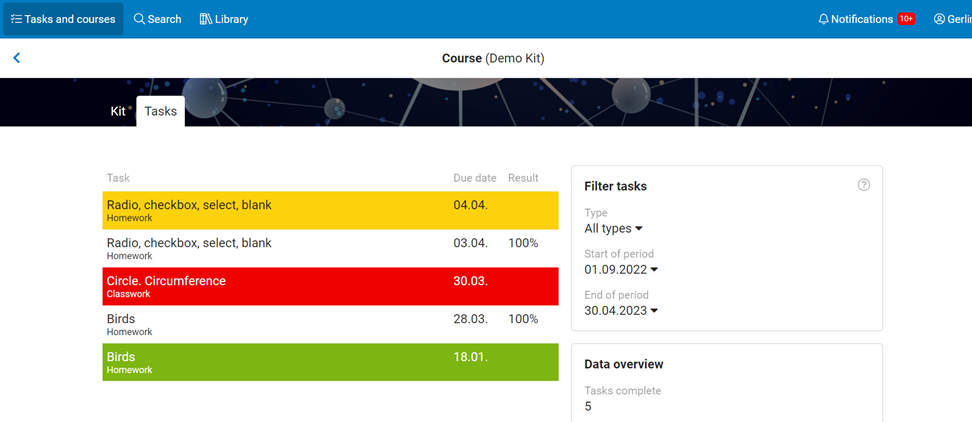
Submitted tasks are tasks that have been sent to the teacher and that the teacher has not yet rated. Submitted tasks are marked with a green bubble.
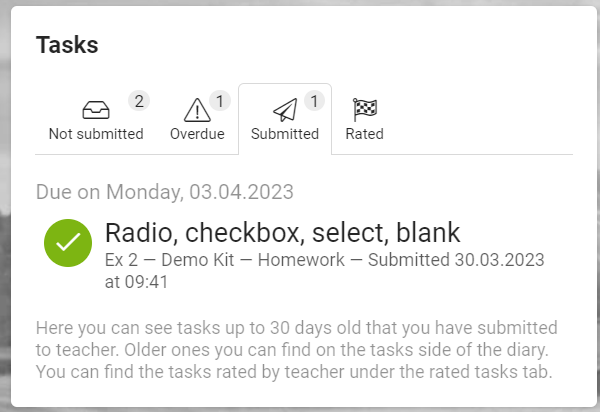
Rated tasks
Under the rated tasks are tasks that have been reviewed by the teacher and the result has been released to the pupil within last 30 days.
Teacher can rate pupil’s tasks with different grading systems:
- 1–5 – numerical grading on a scale of 1–5.
- 0–100% – performance percentage, which shows the percentage of correct answers out of all answers.
- Formative grade – The icon is a circle with a speech bubble in it. The task has been evaluated formatively, i.e. the teacher has written a summary comment on the task.
- Other grade – The icon is a circle with three dots. The teacher has graded the work with a different grade, for example A, B, C.
Bookmarks block
Bookmark helps the teacher to define where the study progress is in any class. It helps learners to find the place where to revise from.
Thanks to bookmark you can quickly access from your dashboard view to the chapter you are currently studying. At the top of the picture illustrating the chapter is the title of the chapter assigned to pupils and circles illustrating the progress of pupil in this chapter, at the bottom of the picture there is the chapter number, name of the study area, a direct link to the table of contents of the work and an overview of tasks connected to the course.
Opiq direct references block
On the right side of the pupils' dashboard you will find Opiq direct references block with useful links.
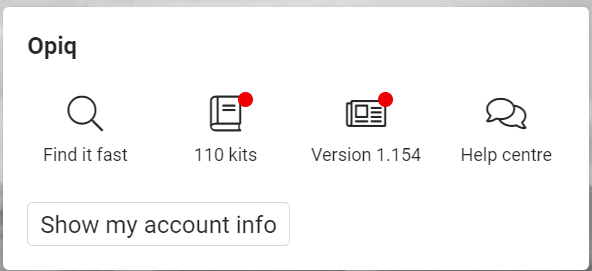
Opiq direct references block contains shortcuts to library and user guides pages.
- “Find it fast” takes you to search page where you can enter a keyword and find chapter titles and content related to it.
- Book icon. When new digital textbooks are added, a red dot appears on the icon. By clicking on the icon, you can see all textbooks in library, the most recently added digital textbooks are automatically shown at the top of the list.
- Version takes you to the Opiq updates list. When the new version is installed, a red dot appears on the icon.
- “Help centre” leads to the user guide’s page.
- “Show my account info” shows who is logged in and what interfaces they have.
Study at Opiq
Library
All learning materials are found in Opiq library. You can search textbooks by subject, publisher, package etc.
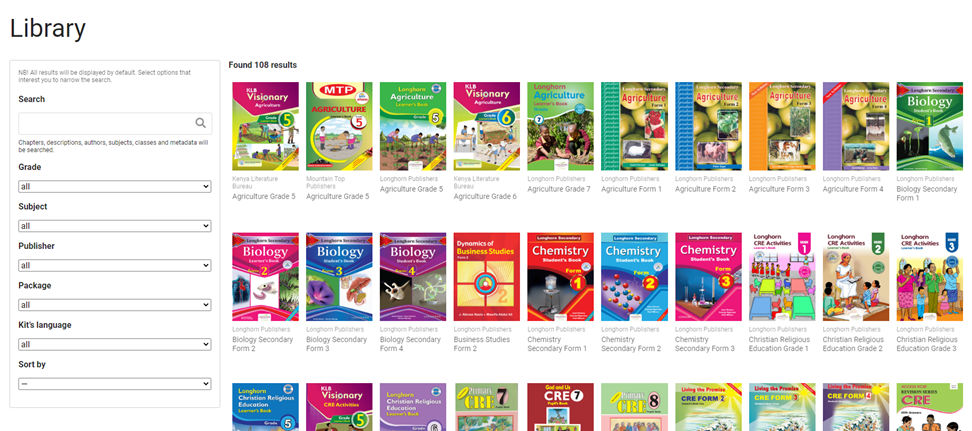
There is a link to the library on the top menu bar and on the pupil's dashboard in the right block where the number of textbooks is shown.
The pupil has access to all textbooks covered under license and solve all the tasks in chapters, regardless of whether the teacher uses these books in teaching or not.
The library displays all study kits in Opiq, not just those that the user has access to. The pupil can also see paid digital textbooks in stock, but to use them, a license must be purchased separately.
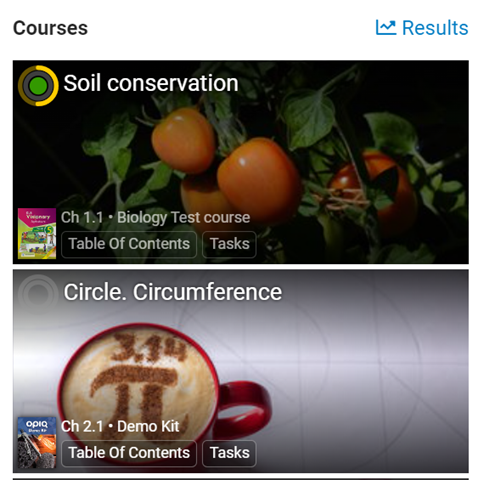
Course
Teacher can create courses from study kit. Study kit is the material found in the library. Study kit is digitalized textbook. They can be recognized by the cover pages as they are identical to the hard copy books.
Course describes the combination of the study kits that the teacher uses to teach a subject in a specific class. If the teacher teaches the same subject in several streams, a separate course is created for each stream. The study kit, pupils and teachers come together in the course. One course can have multiple study kits connected to it.

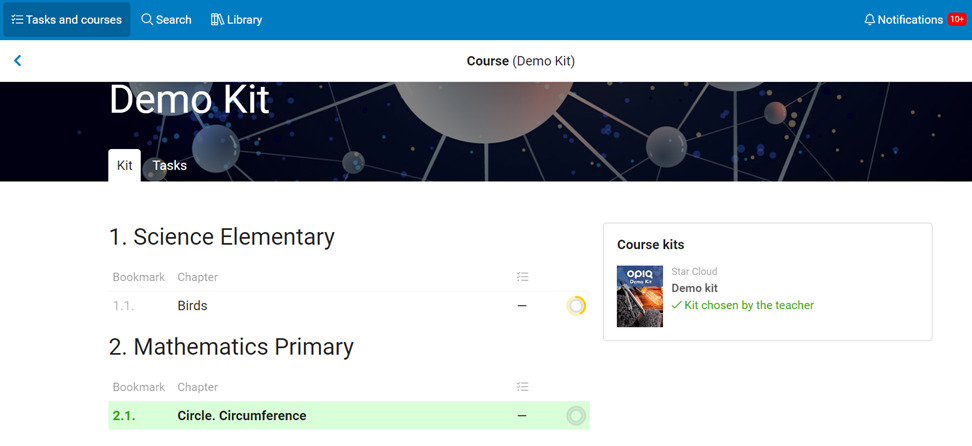
The courses where pupil is added can be seen on the pupil’s dashboard under the courses block. On the course page, from the “Kit” tab you will find study kits that the teacher has added to the course. In the same tab you can see the table of contents of the study kit. In the table of contents, there is a chapter highlighted in green, which the teacher has bookmarked. After the chapters that the pupil has marked as completed, there is a green check mark. In the "Tasks" tab, you can see the tasks assigned by the teacher in this course.
Study Kit
The pupil has access to the chapters of a study kits. Each chapter includes a collection of tasks; however the pupil can only see the tasks that teacher assigns him/her to do.
Each chapter is divided into sections includes following opportunities.
Solving tasks in the chapter
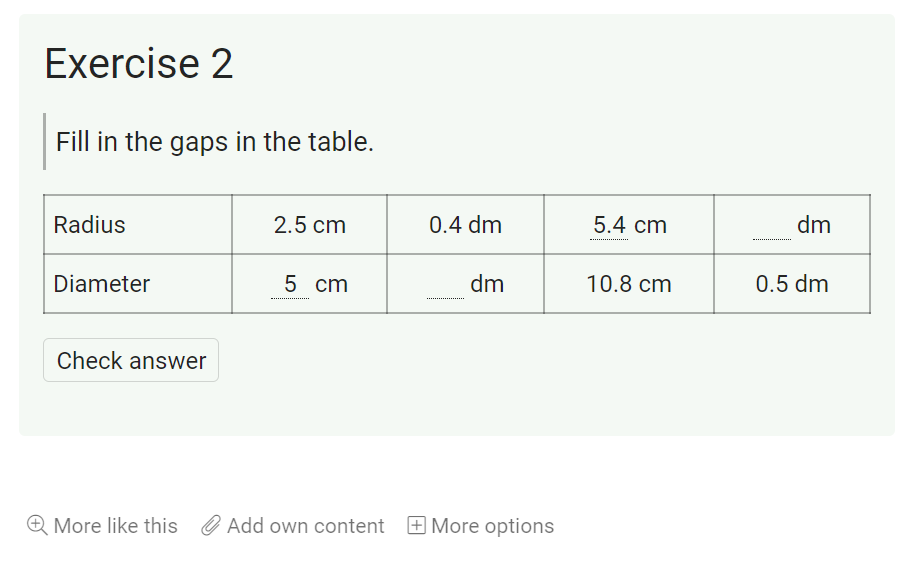
From study kit chapters you can find different auto check exercises which are exercises that have the possibility to determine correct answer(s). In the chapter section the learner gets instant feedback while solving such exercises. Solve the tasks in the chapter, have them checked automatically or save the answers.
Highlighting and commenting on the study kit text
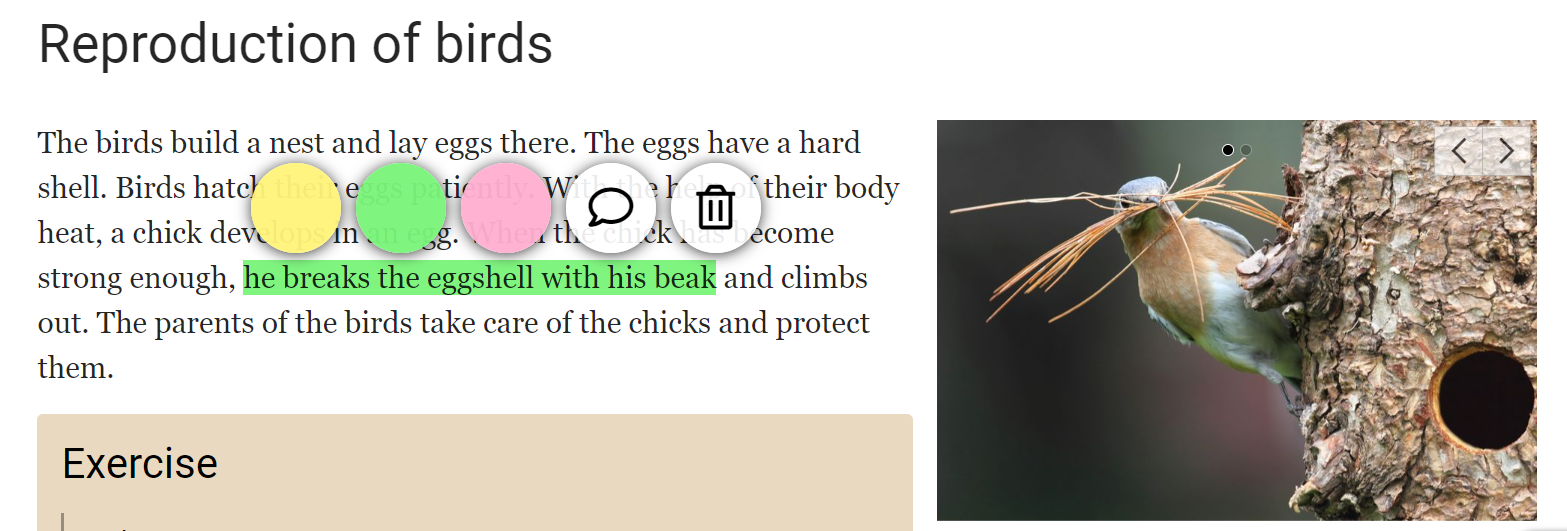
You can use colors to highlight and add your own comments on the textbook text. To highlight a text, select the text with the mouse or on a smartphone with your finger and select the highlighting color or commenting option in the opened menu. When you reopen the chapter, the highlighting and comments are still there.
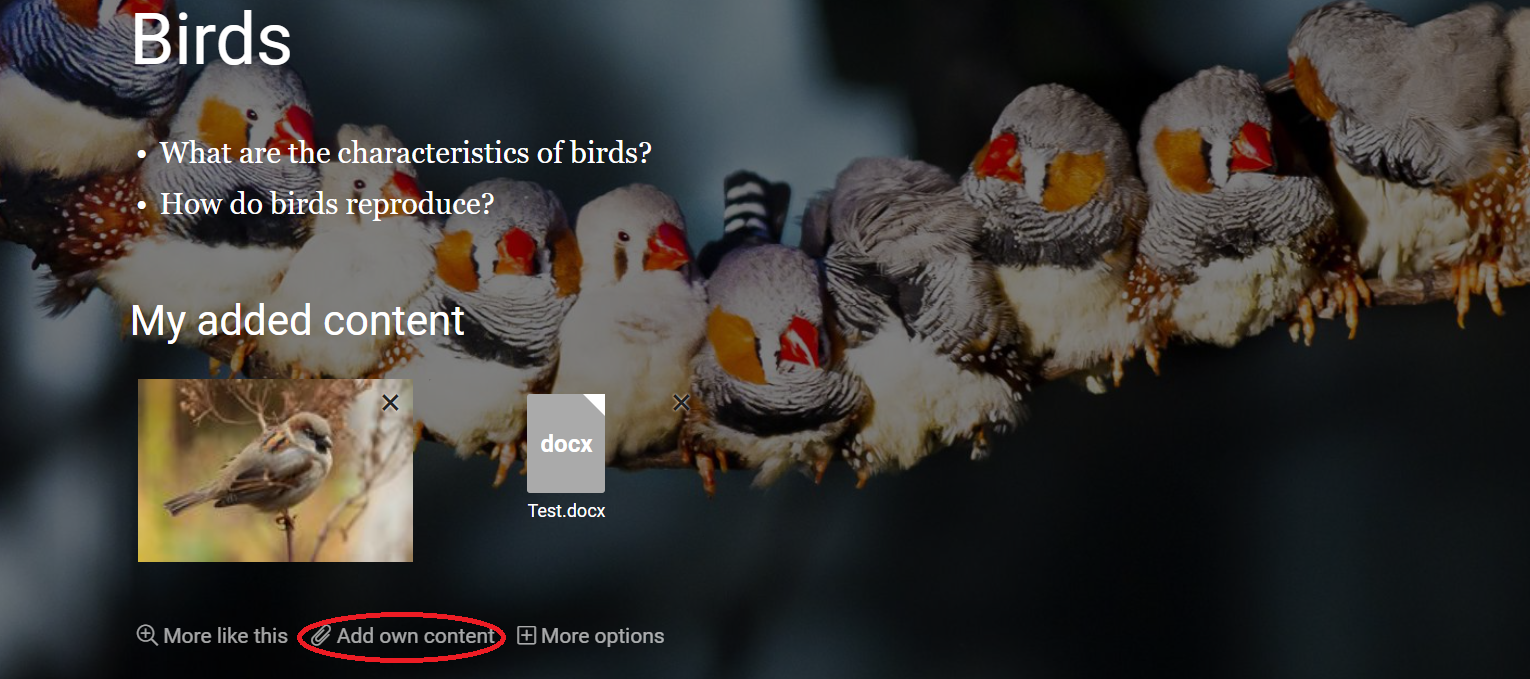
Adding files, links, or text to section
Pupil can add personal files, images and text to each section. To do this, click on the “add own content” link. The teacher cannot see the added material. When you reopen the chapter, the added material is still there. If needed pupil can delete added content as well.
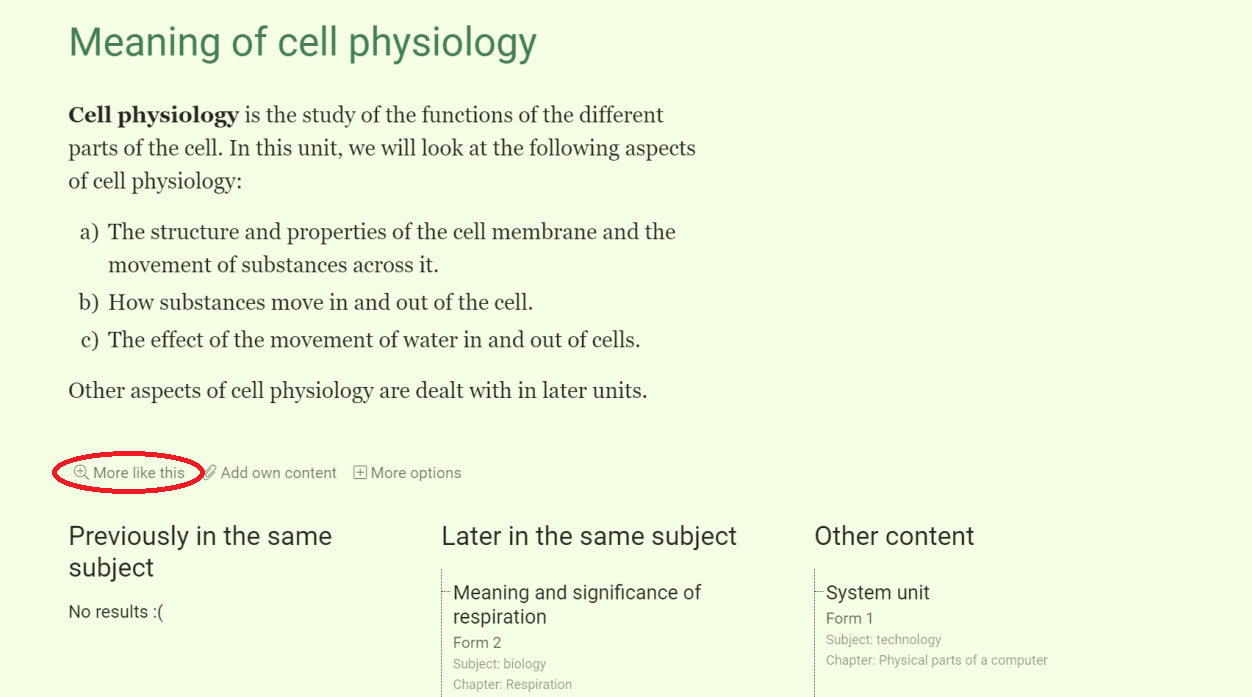
Searching content that is related to a section
Each section of the chapter has a “More like this” link. By clicking on it, the material related to the content of the section will be searched in all materials of the same subject, as well in other subjects. In this way, pupil can easily recall what is previously learnt and also search additional information on the same topic.
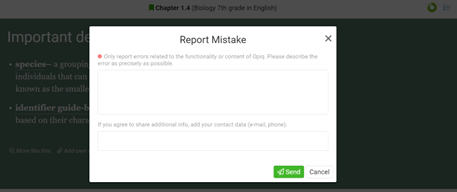
Copying a section link or reporting a mistake
At the end of each section, there is a link "More options" which offers two opportunities:

- “Copy link” - will copy a link to the clipboard that takes you to the section. You can use the link, for example, in your own notes elsewhere or share the section with a teacher.
- “Report Mistake” - by reporting a mistake you can point out if you find any mistakes in the text. This way the publishers of the study kit can find the error and fix it.
Tasks for pupil
The study kits found in the library consist of chapters which are accompanied by tasks and excersise stacks for teachers. Pupils can see on their dashboard view only the tasks from exersice stack which the teacher has assigned them to do.
Solving tasks
- Once the teacher has assigned a task to the pupil, the pupil can see it:
on the dashboard in the tasks block;
- on the tasks page under the course.
When pupil opens the task assigned to him/her, the list of course tasks, links to study materials will be seen. If the task is to read a chapter, the green bubble in front of it means that the chapter is marked by pupil as completed. In all other cases, a green sequence number means that the task has been solved and saved by pupil.

The tasks must be solved, and the answers must be saved on each task separately. The pupil can also add his own material to the task by clicking on the link "Add materials" and uploading the necessary files. The files added to the exercise can also be seen by the teacher. You can use the arrows on the top right to move between tasks, there is a link to the tasks overview page on the top left.

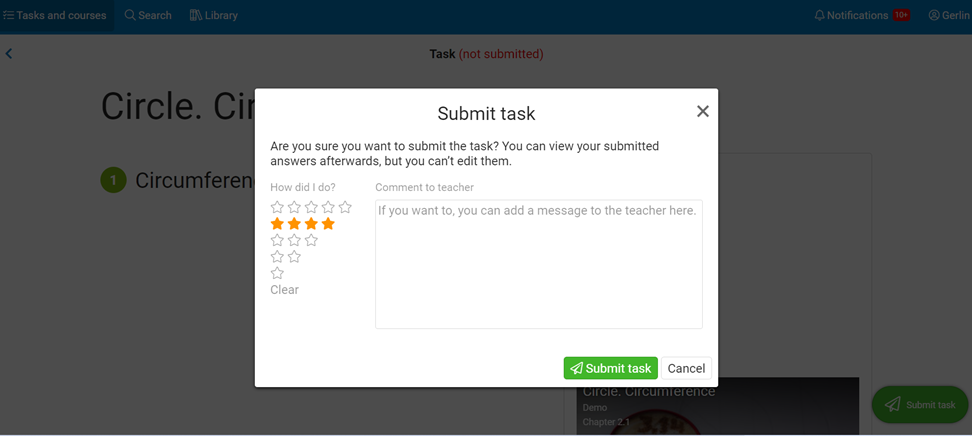
When the tasks are solved and the answers saved, press "Submit task" button. In the window that opens, you can add a message about the assigned task for the teacher if you wish. Before submitting the assigned task, the pupil can evaluate his/her work in the five-star system under the question "How did I do?".
Once the work is submitted, the pupil can only change it if the teacher sends it back to him/her.
Results
If the teacher has reviewed the pupil’s task and disclosed the score, a corresponding notification will appear on dashboard. By clicking on the title of the notification, the pupil can open it and see the results of assignment there.

The pupil can see all the results on the results page. You can find “Results” link under the profile image.
All tasks that have been reviewed by teachers in different courses appear on the results page. Here you can see an overview of all rated tasks and compare your average performance with the average of your class.
By clicking on the “tasks” of the bookmarked course, the tasks page of this course opens, where you can see your tasks and results in this course.
User for parent
Differences between the role of a pupil and a parent
- A parent can see tasks assigned to their child and the child's saved answers, but cannot solve, edit, save, or submit those.
- The parent cannot save the answers, but he/she can solve the auto check exercises in the chapters to check what are the correct answers.
- A parent cannot mark a chapter as completed, but they can see whether their child has done it or not.
- The parent can comment the text in the chapter. The parent and child can see and edit each other's added comments.
How to add a parent account?
A pupil can add a parent’s account by clicking on the link “My parents” on their settings page.
Then a page opens where you have to insert parent's information.
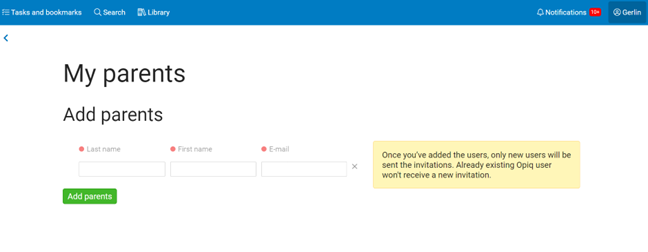
If the parent did not have an Opiq account previously, he/she will now receive an invitation to create one. When a pupil's parent logs in to Opiq, they see the same view as their child however the parent cannot edit the child's tasks, submit those, save their answers in chapters, or mark chapters as completed.
The parent's account can also be added by the school administrator in the detailed view of the pupil's data. Find more about this from here.
Search
The fastest and most efficient way to find needed learning material in Opiq is using the search function. You can access the search page by clicking on the magnifier icon in the top menu bar. The pupil can search the chapters of all material in the Opiq library, also their results of courses will be searched. If you want to find an exact word or phrase, put it between quotation marks.
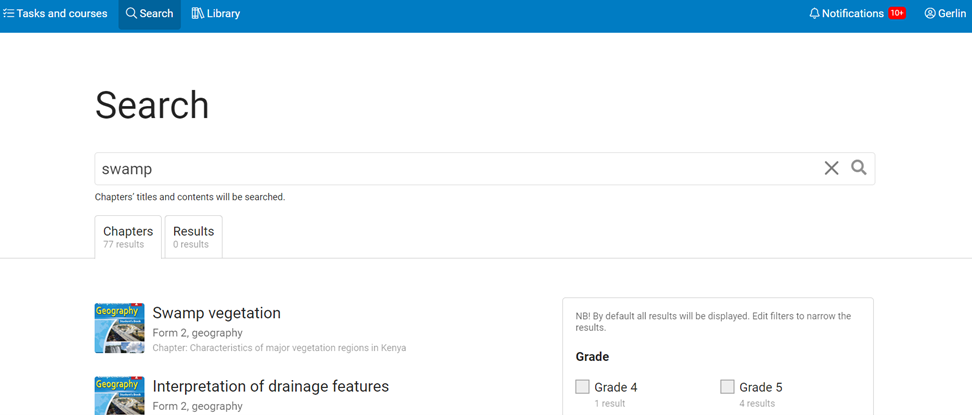
Chapter search
Searches the content of all chapters from all study kits in Opiq Library, including in-chapter tasks. Search results are displayed with section precision. After finding all the search results, the results can be narrowed down using grade or subject filters.
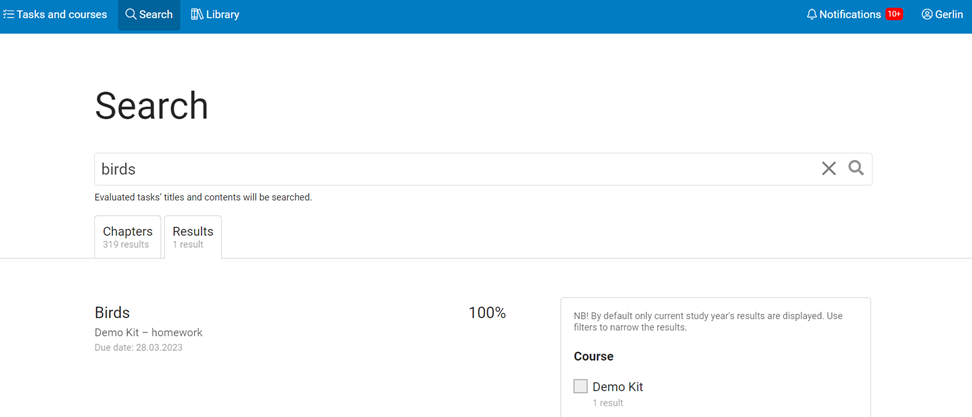
Results search
Helps to search results of submitted tasks which have been published by the teacher. By default, the results of this academic year are searched, however the search can be extended to all academic years as well. The results can be filtered by course, task result (grade, performance percentage, etc.) and task type.
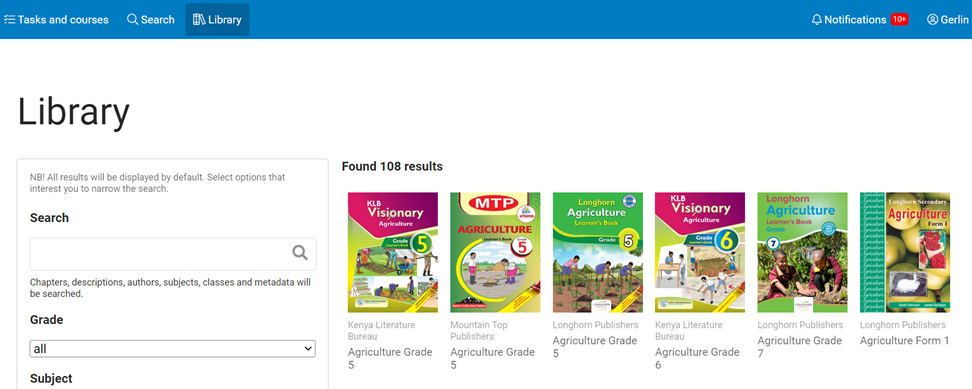
Library search
In case you are interested in finding some specific study kit you can use the search engine from Library. It searches the table of contents and description of all study kits in Opiq library. If no search word is entered, all study kits will be displayed. Results can be filtered by grade, subject, publisher, package and language of the study kits.
Additional information
Additional information can be requested by writing to info@opiq.co.ke or by calling +254 205 148 194 (Mon-Fri from 9:00 am to 5:00 pm). Also, check announcements on our Facebook page.
- Service provided by Star Cloud Ltd